Web 2.0 Backlink Guide — RankVed
Doctor Backlink Program

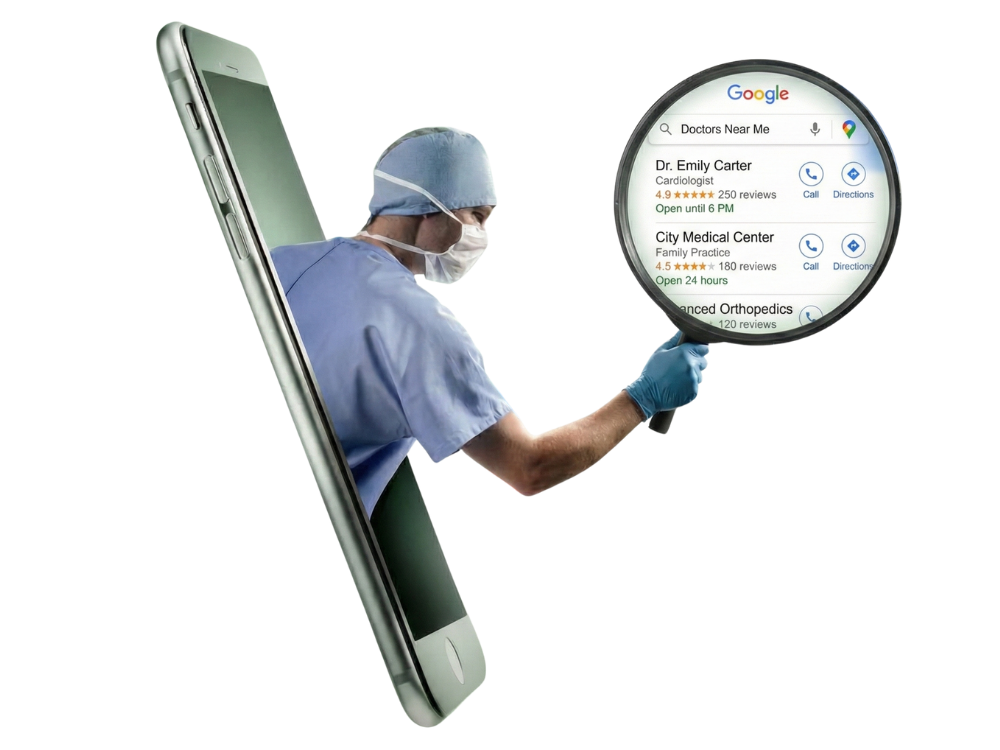
Web 2.0 Backlink Guide for Doctors

Build authoritative backlinks to your practice website using free publishing platforms. Each platform creates a separate indexed web presence that links back to your main site, boosting your Google ranking.

Why doctors should do this: Each platform you publish on creates a high-authority backlink to your practice website. Google sees multiple trusted sources linking to your site and ranks it higher in local and medical search results. This is called a Web 2.0 backlink strategy and it costs nothing.
Platform Authority at a Glance
High
WordPress.com
Best overall, cleanest backlink
High
Blogger
Google-owned, fastest indexing
Medium
Substack
High DA, limited SEO control
Medium
Google Sites
Google-owned, fast for low competition
Medium
Weebly
Decent authority, SEO panel access
Lower
Wix
Messy URL, use for link diversity
Lower
LiveJournal
Aged domain, contextual links
Lower
Jimdo
Tier 2 support links only
Lower
Blogsidea
Tier 2 link diversity only
W

WordPress.com

Strongest Web 2.0 platform. Best choice for primary backlinks to your practice site. Clean subdomain, strong domain authority.

wordpress.com
Part 01

Create Account, Free Plan and First Post

1
Create Account
AGo towordpress.com
BClickGet Started (top-right)
CEnterEmail, Username, Password
DClickCreate your account
Use email sign-up, not Google. This gives you more control over the account.
2
Start Site Setup
AClickCreate a Site
BScreen“What kind of site?” — click Skip
3
Choose Domain
ATypeYour site name e.g. drsmithclinic
BWaitLet suggestions load
CSelectyourname.wordpress.com — click Select on the right side only
Do not select any domain showing a price. Pick only the free .wordpress.com subdomain.
4
Select Free Plan Critical
AScreenPricing page opens — Personal, Premium, Business all shown
BScrollScroll all the way to the bottom of the pricing page
CClick“Start with a free site” — tiny text, bottom of page, light in colour
WordPress hides this link on purpose. Scroll completely to the bottom — it is there as small, light-coloured text.
5
Complete Setup and Open Dashboard
AEnterAny site name when prompted
BSkipAll remaining setup screens — Skip, Continue, or Finish
CClickMy Site (top-left) then Site Dashboard
6
Write and Publish First Post
AGo toPosts then Add New Post
BTitleClick Add Title and type your article title
CBodyClick + then Paragraph — write content
DHeadingClick + then Heading block
EImageClick + then Image then Upload
FSettingsTop-right gear icon — add Featured Image, Category, Tags
GPublishTop-right — click Publish — confirm Publish
Your URL:https://yoursite.wordpress.com/post-name

Part 02

Connect Google Search Console

1
Add Property
AGo tosearch.google.com/search-console — click Start Now
BSelectURL Prefix
CEnterhttps://yoursite.wordpress.com then Continue
2
Copy Code and Paste in WordPress
AChooseHTML Tag method — click Copy
BGo toWordPress Dashboard — Tools (left menu)
CClickMarketing — Traffic tab — scroll to Site Verification
DPasteCode into Google Verification Code field — click Save Settings
3
Verify
ABack to GSCClick Verify
Site is now connected to Google Search Console.

Part 03

Get Your Post Indexed

1
URL Inspection and Request Indexing
AIn GSCPaste your post URL in the top search bar — press Enter
BClickRequest Indexing
2
Submit Sitemap
AIn GSCLeft menu — Sitemaps
BEntersitemap.xml — click Submit
Sitemap URL:https://yoursite.wordpress.com/sitemap.xml

Key Notes — WordPress

Free plan link is hidden at the bottom of the pricing page. Scroll all the way down.
Always pick the .wordpress.com subdomain. Never a paid domain.
Publish your post before submitting to GSC. Google needs a live page to crawl.
B

Blogger

Google-owned. Fastest indexing of all Web 2.0 platforms. Auto-verifies in GSC if you use the same Gmail. Clean subdomain, always free, no hidden pricing.

blogger.com
Part 01

Create Blog and First Post

1
Open Blogger and Create Blog
AGo toblogger.com — click Sign In — login with Google account
BClickCreate New Blog (from dashboard)
2
Set Title and Subdomain
ATitleEnter anything e.g. Dr Smith Health Tips
BAddressType drsmithblog — system checks availability
CClickSave
Your URL:https://drsmithblog.blogspot.com
Blogger gives a clean subdomain. No hidden pricing. Always free.
3
Write and Publish Post
ALeft menuPosts — click New Post
BWriteAdd title at top, write content below
CFormatToolbar — Heading, Image (upload from computer), Links
DSettingsRight panel — add Labels (tags) and optional Permalink
EPublishTop-right — click Publish — confirm
Your URL:https://yourname.blogspot.com/post-name

Part 02 + 03

GSC Verification and Indexing

1
Add Property, Verify and Index
AIn GSCAdd Property — URL Prefix — enter https://yourname.blogspot.com
BAuto verifySame Gmail — click Verify — auto verified instantly
CIf not autoHTML Tag — copy code — Blogger Theme — Edit HTML — paste inside head — Save
DIndexGSC top bar — paste post URL — Enter — click Request Indexing
ESitemapGSC Sitemaps — enter sitemap.xml — Submit
Sitemap:https://yourname.blogspot.com/sitemap.xml

Key Notes — Blogger

Google-owned — fastest indexing among all Web 2.0 platforms.
Use the same Gmail for Blogger and GSC — verification happens automatically.
Clean domain — better backlink quality than Wix or Jimdo.
W

Wix

Good for link diversity. Blog must be installed manually from App Market. URL format is messier than WordPress or Blogger.

wix.com
Part 01

Create Site and First Blog Post

1
Create Account and Site
AGo towix.com — click Get Started — enter Email and Password — Sign Up
BTypeAny website type (blog or health) — click Next
CChooseCreate with Editor (more control, more stable)
DTemplateClick any template — hover — click Edit
2
Save and Get Free Subdomain
ATop barClick Save
BPopupClick “Get a Wix domain”
CEnterSite name e.g. drsmithclinic
DClickSave and Continue
Your URL:username.wixsite.com/yourname
Wix will push upgrade screens after saving. Click Continue with Free Site or close the popup. Never click Upgrade.
3
Install Blog Feature
Wix does not install a blog by default. You must add it manually from the App Market.
ALeft menuClick Add Apps or Add Elements
BClickApp Market
CSearchWix Blog — click Add to Site — wait for install
4
Write and Publish Post
ALeft menuBlog — click Create Post
BWriteAdd title, body content, images using editor toolbar
CSettingsRight panel — add Cover Image, Categories, Tags
DPublishTop-right — click Publish
Your URL:https://username.wixsite.com/sitename/post-name

Part 02 + 03

GSC Verification and Indexing

1
Verify and Index
AIn GSCAdd Property — URL Prefix — enter https://username.wixsite.com/sitename
BCopyHTML Tag code
CIn WixDashboard — Settings — Marketing and SEO — Site Verification — paste code — Save
DVerifyBack to GSC — click Verify
EIndexGSC top bar — paste post URL — Request Indexing
FSitemapGSC Sitemaps — enter sitemap.xml — Submit
Sitemap:https://username.wixsite.com/sitename/sitemap.xml
We

Weebly

Clean subdomain, decent authority. Blog needs to be added as a page manually. Has a proper SEO panel for verification.

weebly.com
Part 01

Create Site and Blog Post

1
Create Account and Setup
AGo toweebly.com — Sign Up — enter Email and Password — Create Account
BChooseWebsite (not Online Store)
CTemplateChoose any theme — click Start Editing
DDomainClick Use a Subdomain — enter name e.g. drsmith — Continue
Your URL:drsmith.weebly.com
If a pricing popup appears, click Continue with Free or Skip. Never click Upgrade.
2
Add Blog Page and Publish Post
ATop menuPages — Add Page (+) — select Blog Page — click Add
BNew postClick Blog Page — click New Post
CWriteEnter post title — write content — drag Text, Image, Title from left sidebar
DSettingsAdd Categories and Tags
EPublishTop-right — click Publish
Your URL:https://drsmith.weebly.com/blog/post-name

Part 02 + 03

GSC and Indexing

1
Verify and Index
AIn GSCAdd Property — URL Prefix — enter https://drsmith.weebly.com
BCopyHTML Tag code from GSC
CIn WeeblyEditor — top menu Settings — SEO — paste in Header Code — Save
DVerifyBack to GSC — click Verify
EIndexGSC top bar — paste blog URL — Request Indexing
FSitemapGSC Sitemaps — enter sitemap.xml — Submit
G

Google Sites

Google-owned. Ranks fast for low-competition terms. No blog system — create pages as posts. Auto-verifies in GSC with same Gmail. No sitemap available.

sites.google.com
Part 01

Create Site and Content Pages

1
Create and Build Your Site
AGo tosites.google.com — Sign In — click Blank (top-left)
BNameClick Untitled Site (top-left) — enter your site name
CTitleClick page title area — enter main heading
DContentRight panel — Insert — Text box, Images, Layouts
2
Add One Page Per Blog Topic
Google Sites has no blog system. Each page you create is a separate URL. Treat each page as a blog post.
ARight panelPages tab — click + (New Page)
BNameEnter topic name e.g. “Knee Pain Treatment” — click Done
CRepeatCreate one page per article topic
3
Publish and Verify in GSC
ATop-rightClick Publish — enter site address e.g. drsmithhealth — click Publish
BIn GSCAdd Property — URL Prefix — enter full URL below
CAuto verifySame Gmail — click Verify — usually auto verified
DIndexGSC top bar — paste each page URL — click Request Indexing
Your URL:https://sites.google.com/view/drsmithhealth
Google Sites has no sitemap.xml. Skip the sitemap step. Index each page manually via URL Inspection.
J

Jimdo

Weaker authority. Use for Tier 2 support links and link diversity only. No real blogging system — create pages as posts.

jimdo.com
All Parts

Create, Publish and Index

1
Create Account and Get Subdomain
AGo tojimdo.com — click Start for Free — enter Email and Password — Sign Up
BChooseDolphin (AI builder, recommended)
CSkipAll setup questions quickly
DSubdomainEnter name e.g. drsmith — you get drsmith.jimdofree.com
EFree planIf pricing appears — click Continue with Free Plan or Skip
2
Create Pages and Publish
APagesClick Pages or Navigation — Add New Page — name it Blog 1
BAdd contentClick inside page — click + button — add Text, Image, Heading
CPublishTop bar — click Publish
Your URL:https://drsmith.jimdofree.com/blog-1
3
GSC Verification and Indexing
AIn GSCAdd Property — URL Prefix — enter https://drsmith.jimdofree.com
BIn JimdoSettings — SEO or Head Code — paste meta tag — Save
CVerifyBack to GSC — click Verify
DIndexGSC top bar — paste page URL — Request Indexing
S

Substack

High-authority domain. Great for contextual backlinks. No HTML head access so full GSC domain verification is not possible. Index posts via URL inspection only.

substack.com
Part 01

Create Publication and First Post

1
Create Account and Publication
AGo tosubstack.com — click Start Writing — enter Email — Continue
BCheck emailClick the login link sent to your inbox (no password needed)
CCreateEnter Publication Name and short Description — Continue
DSubdomainEnter URL name e.g. drsmithhealth
ESkipAny Stripe or paid newsletter setup — click Skip or Set up later
Your URL:https://drsmithhealth.substack.com
2
Write and Publish Post
ADashboardTop-left — click New Post
BWriteAdd title, write content, add images and links using toolbar
CSettingsSet Audience to Public and Post type to Standard post
DPublishTop-right — Publish — Publish now — Confirm
Your URL:https://drsmithhealth.substack.com/p/post-name

Part 02 + 03

Indexing (Limited GSC Control)

1
Index Without Full Verification
Substack does not allow HTML head access. Full domain GSC verification is not possible.
AIndex postsPaste each full post URL into GSC top bar — click Request Indexing
BBoostLink from your WordPress or Blogger posts to this Substack URL
CShareShare the post on social media to accelerate crawling
LJ

LiveJournal

Aged domain — good for link authority diversity. No SEO control, no head tag access. Use only for contextual backlinks.

livejournal.com
All Parts

Create, Post and Index

1
Create Account and Write Post
AGo tolivejournal.com — Create an Account — enter Username, Email, Password
BVerifyCheck email and verify if prompted
CPostTop menu — click Post or Write or Update Journal
DWriteAdd title — write content — use toolbar for headings, images, links
ESettingsSet Visibility to Public — add Tags
FPublishClick Post or Publish or Update Journal
Your URL:https://username.livejournal.com/12345.html
2
Indexing Without GSC Verification
LiveJournal does not allow head tag access. Full GSC domain verification will fail. Use URL inspection only.
AIn GSCPaste full post URL in top bar — click Request Indexing
BBoostLink to this post from your Blogger or WordPress Web 2.0 site
Bl

Blogsidea

Lower authority. Use only for Tier 2 link diversity. Not recommended for main SEO assets or money pages.

blogsidea.com
All Parts

Create, Post and Index

1
Create Account and Site
AGo toblogsidea.com — click Register (top-right)
BEnterUsername, Email, Password — click Register
CCreateDashboard — click Create a free website
DNameEnter site name e.g. drsmith
Your URL:https://drsmith.blogsidea.com
2
Write Post and Index
ADashboardPosts or Articles — click Add New Post
BWriteAdd title and content — use toolbar for headings and images
CPublishClick Publish or Save
DIndexGSC — paste post URL — click Request Indexing
EBoostLink from Blogger or WordPress to this post to speed up crawling
GSC domain verification will likely fail on Blogsidea. Index posts one at a time using URL Inspection in any verified property.
S

Backlink Strategy for Doctors

How to use all 9 platforms together to maximize your practice website’s Google ranking.

Priority 1 — Do First

  • WordPress.com — highest authority, cleanest subdomain
  • Blogger — Google-owned, fastest indexing, auto GSC verify
  • Both posts should link back to your practice site

Priority 2 — Add Next

  • Substack — high domain authority, great for medical content
  • Google Sites — Google-owned, ranks fast for low competition
  • Weebly — decent authority, proper SEO panel

Priority 3 — Link Diversity

  • Wix, Jimdo, LiveJournal, Blogsidea
  • Use these to add variety to your backlink profile
  • Supporting layer only, not your main assets

Content Tips

  • Write about medical topics relevant to your specialty
  • Symptoms, treatments, patient FAQs work very well
  • Include a natural link to your practice website in each post
  • Always publish before submitting any URL to Google

Universal Rules for All Platforms

Always publish your post first, then submit the URL to GSC. Google needs a live page to crawl.
Use the same Gmail for Blogger, Google Sites, and GSC for automatic verification on Google-owned platforms.
For platforms where GSC verification fails, use URL Inspection in any verified property you already own.
Link between your Web 2.0 posts. A WordPress post linking to your Blogger post creates a stronger backlink network.
Medical Web Design Enquiry

Ready to Identify Hidden Issues Impacting Your Organic Visibility?

Claim your expert-backed SEO proposal-no cost, no obligations.